How to Make Essential Oils
Essential oils are highly concentrated oils extracted from aromatic plants such as lavender and rosemary. About 700 different types of plants contain useful essential oils, and there are several methods used to extract them — the most common of which is distillation. While essential oils can be very expensive to buy, they are relatively cheap to distill at home.
Steps
Part 1Setting up Your Essential Oil Still
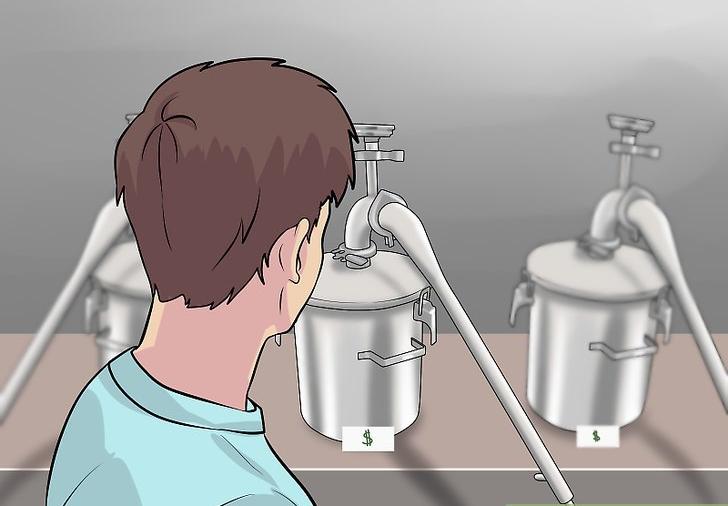 1Purchase an essential oil still. Although you’ll likely be hard-pressed to find one in a store (unless you have a specialty store nearby), these stills are easy to buy online. However, beware that they can be expensive — usually around a couple hundred dollars. If you plan on making large quantities of essential oil, a professional still is a good investment.
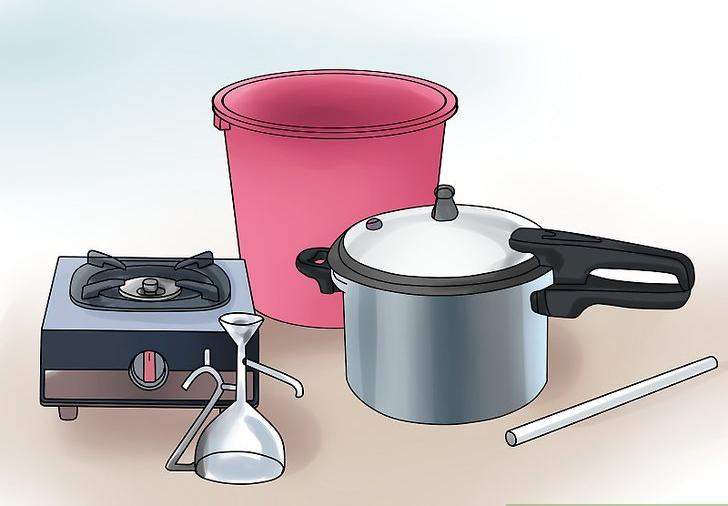 2Build your own still if you don’t want to buy one. If you want to try building a still, you've got plenty of room for creativity - there are thousands of still designs, and even today, many stills are homemade. The key components of a still are:
- A heat source — usually direct fire
- A pressure cooker
- A 10 mm glass pipe
- A tub of cold water to cool down and condense the steam flowing through the pipe[1]
- An essencier, which separates out the essential oil from other materials you don’t want in your final product.[2]
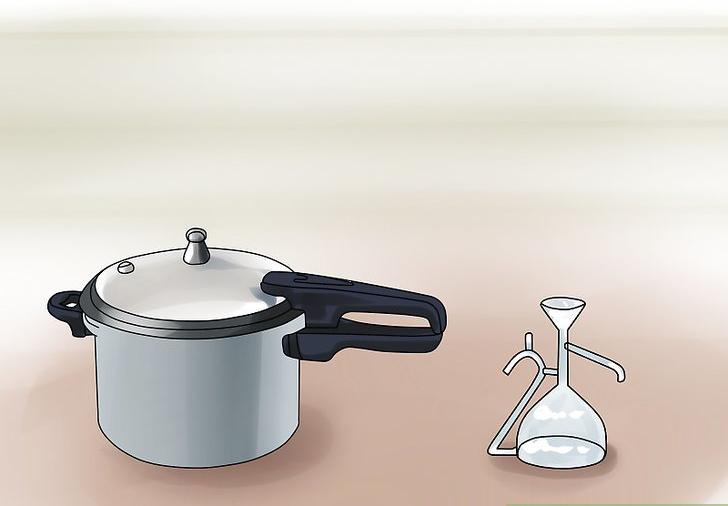 3Use stainless steel and glass parts, if possible.[3] Do not use plastic tubing in place of a glass pipe, as it can affect the quality of the oil. Some plants react badly with copper, but heavily tinned copper is suitable in all cases. You can also use aluminum materials, but not with wintergreen, cloves, or other plants whose oils have phenols.
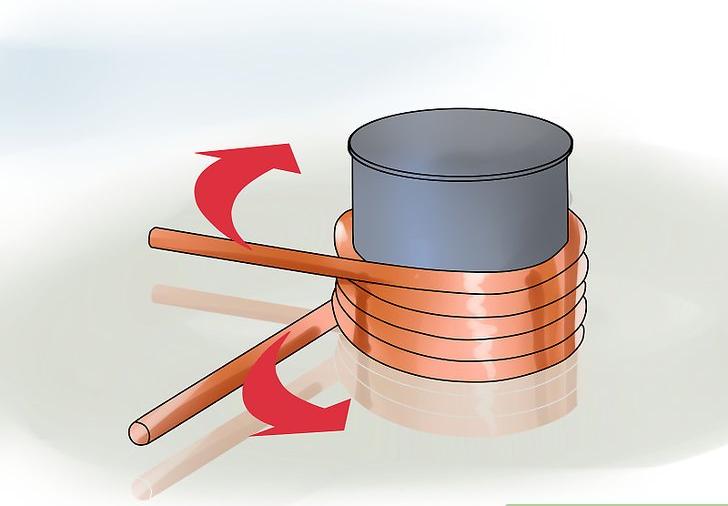 4Bend the pipe so it can pass through the cooling tub. You’ll bring the plant matter to heat in the pressure cooker, and the resulting steam will pass through the pipe. You have to be able to cool that steam back down to liquid by immersing it in a cold water or ice bath. Depending on what you’re using for your cooling tub, you’ll have to bend the pipe in different shapes. For example, if you’re simply using a basin, you might have to bend it into a coil so that it can lay in the open tub. If you’re using a large bucket of ice, you might be able to bend the pipe to a 90 degree angle so that it can go down through the top of the bucket, then out a hole in the bottom.
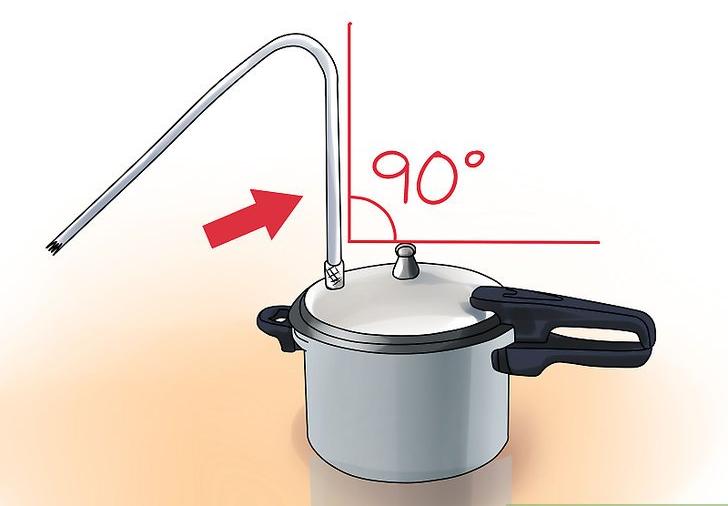 5Connect the pipe to the pressure cooker valve. Use a small piece of flexible hose that fits snugly over both openings, which should be roughly the same size if you’re using a 10 mm pipe. You can secure the connection using a jubilee clip purchased at a hardware store.
- Make sure you cut the hose long enough to allow some room to bend. Otherwise, your pipe will stick straight up in the air, and you’ll have to give it a 90 degree bend so it can run toward the cooling tub.
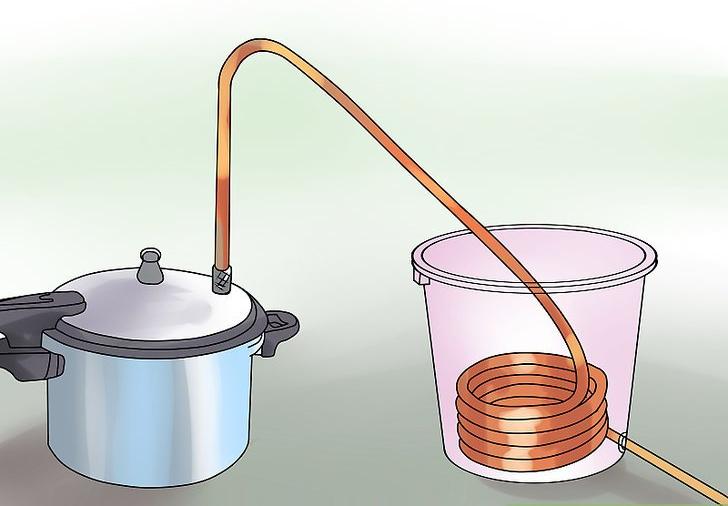 6Run the pipe through the cooling tub. If you’re using an open basin, position it so that the coil lies completely inside the tub. It should be completely submerged when the basin is filled with cold water or ice. If you’re using a bucket, drill a small hole in the bottom so the pipe can pass out of the ice bath. Seal the hole using a silicone sealer or epoxy to prevent water from dripping through it and making a mess.
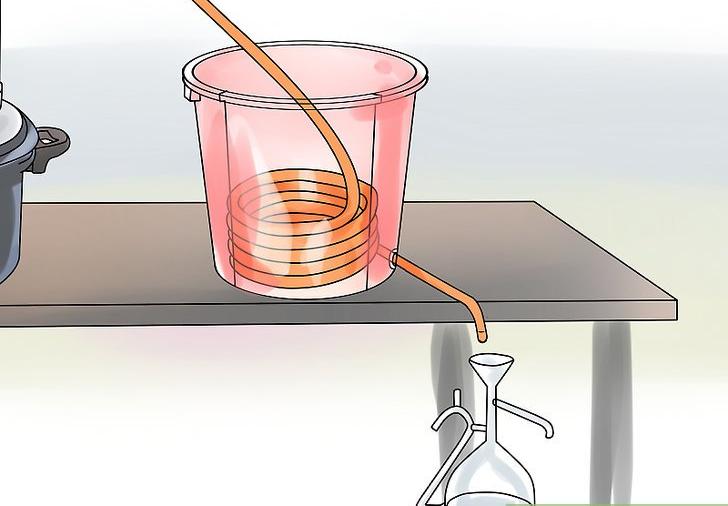 7Position the open end of the pipe over the essencier. Once the distillate drips into the essencier, it will do all the rest of the work for you. It will separate the essential oil from the rest of the matter that you don’t want in your final product.
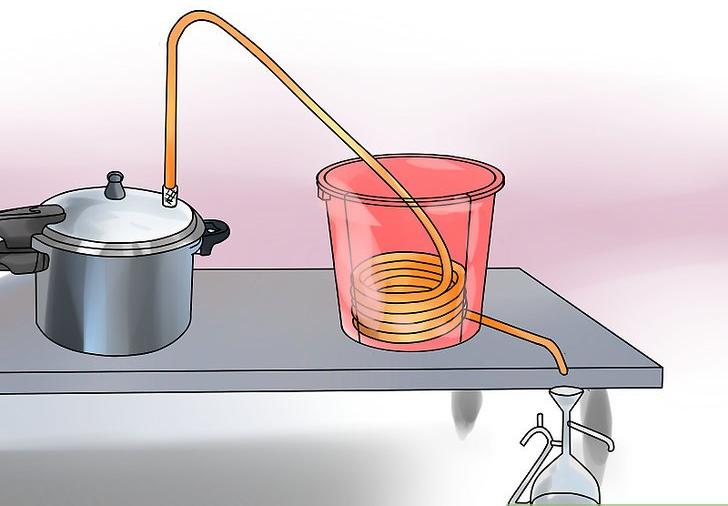 8Make sure all your instruments are in stable positions. Depending on the tools you’re using and the shape of your pipe, you may have to work a little bit to find a safe, stable setup for all of your still components. Put the lid on the pressure cooker with the pipe attached to it, run the pipe through your cooling tub, and position the open end of the pipe over your essencier. Make sure the pipe is at a comfortable angle and nothing will get knocked over.
Part 2Preparing Your Plant Material
 1Determine when to harvest your plant material. The amount of oil in a plant depends on where it is in its life cycle, so it’s important to harvest each species of plant at the right time. You need to do some research to figure out when to harvest the plants you want to distill. For example, lavender should be harvested when about half the flowers on the stem have withered. Rosemary, on the other hand, should be harvested when the plants are in full bloom.[4]
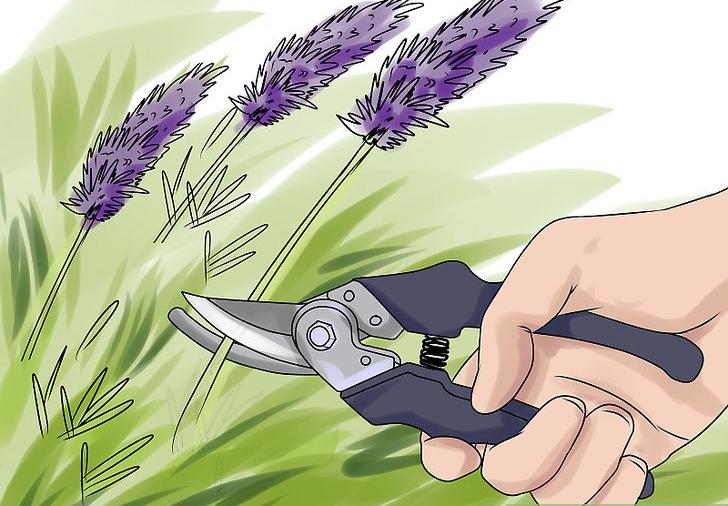 2Harvest your plants correctly. Just as you need to research when to harvest plants for best essential oil production, you need to research how to harvest them. Careless handling, harvesting the wrong parts, even harvesting at the wrong time of day can reduce the quantity and quality of the essential oils. For example, you only want to use the flowering tops of the rosemary plant when making rosemary essential oil. Discard or use the rest of the plant some other way.
- Most essential oils are held in the plant's oil glands, veins and hairs, and these are very fragile. If you disturb or break them, you’ll get less oil from your plants. Handle the plants with care, and handle them as little as possible.
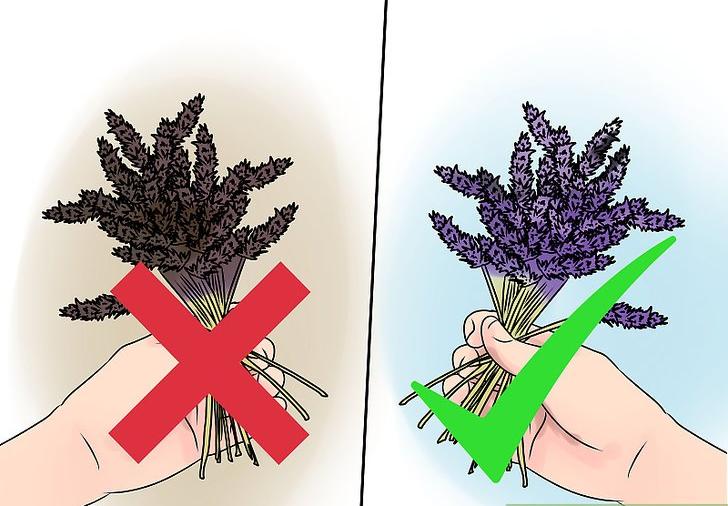 3Be choosy if purchasing your plants. If you're buying already-harvested plants, you will not have much control over the harvesting process. Look for plants that appear healthy and undamaged, and ask the seller when they were harvested. Generally, plants that are in whole form (not crushed or powdered) are best.
- While distillation removes many impurities, pesticides and herbicides can contaminate your oil. It’s best to use organically grown plants, whether you purchase them or grow your own.
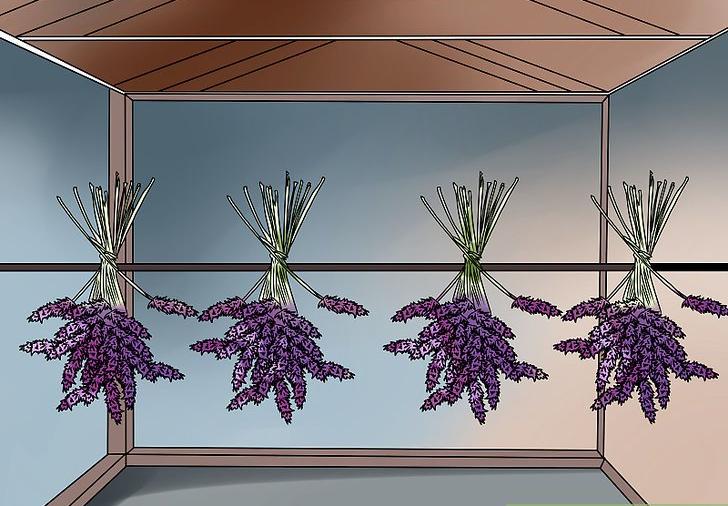 4Dry the plant material. Drying reduces the amount of oil in each plant, but can greatly increase how much essential oil you make per batch. This is because you’ll be able to fit more material into each batch. Drying should be done slowly and away from direct sunlight.[5] Commercially grown plants such as lavender and peppermint may be allowed to dry in the field after cutting for a day or so.
- The ideal drying method varies from plant to plant, but in general, you shouldn’t overheat the plants. Drying in the shade or even in a dark room minimizes the oil loss.
- Don’t allow the plants to become wet again before distillation. Distill as soon as possible after drying.
- You can choose not to dry your plant material if you’d like to skip this step.
Part 3Distilling Your Essential Oil
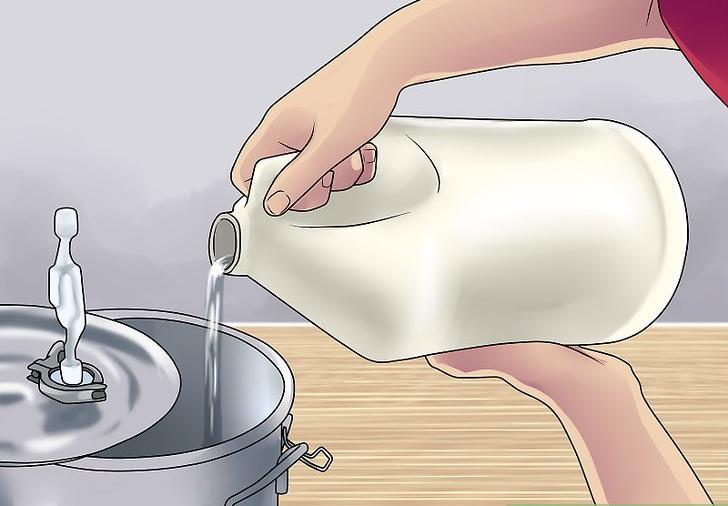 1Pour water into the tank of your still. If you made your own still, your tank is the pressure cooker. Use clean water; it should be ideally filtered or distilled and as soft as possible. If you're using a manufactured still, follow the manufacturer's direction. Otherwise, just make sure you have enough water to complete the distillation. Depending on the plant and on the quantity, distillation can take anywhere from a half-hour to six hours or more after the water boils.
 2Add your plant matter to the water. Fit as much plant matter as the tank can contain. As long as you have enough water to last without boiling off, your plants should be fine even if they’re packed in tight. Just make sure that they don’t block the steam outlet in the lid of the pressure cooker. Give yourself a couple inches of leeway.
- You don’t need to chop or otherwise prepare the plant in any way — in fact, doing so will cause you to lose some of the oils.
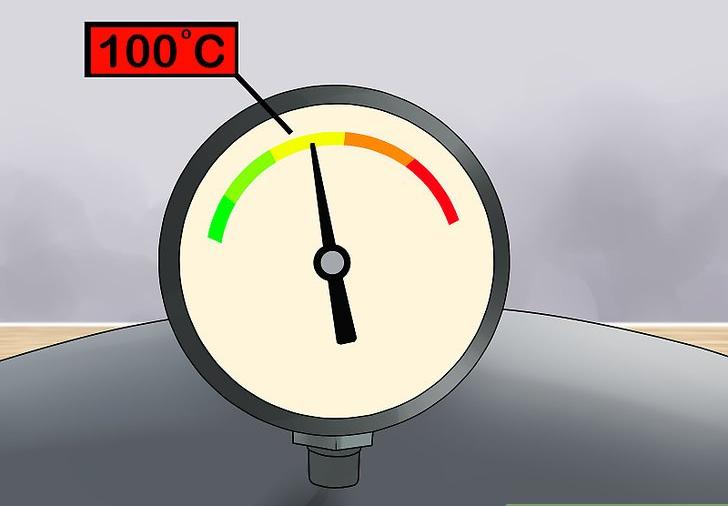 3Bring the pressure cooker to a boil. Seal the lid so that the only steam that escapes must travel through the pipe that’s attached to the steam valve. Most plants will release their essential oils at 100 degrees Celsius or 212 degrees Fahrenheit — the normal boiling point of water.[6]
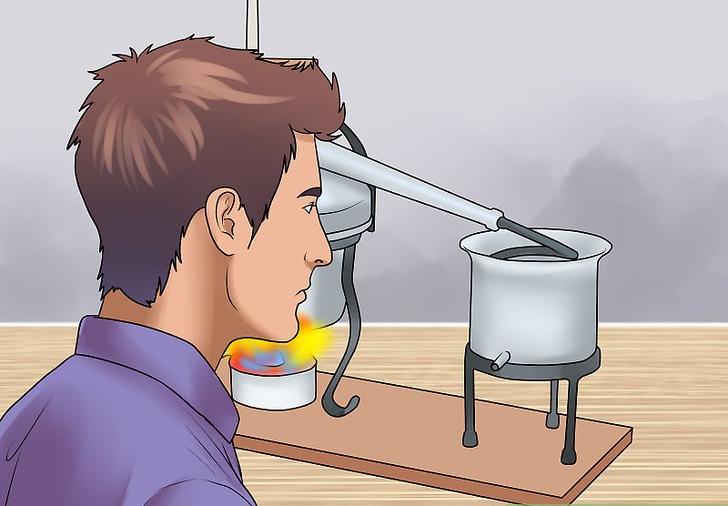 4Keep an eye on the still. After a while, the distillate should begin to come through your condenser and into your separator. The process should be fairly hands-off, but you want to make sure you don’t run out of water in your still. Depending on the length of the distillation process, you may also need to change the water in the cold-water tub. If the hot pipe warms the water up, replace it with fresh cold water or ice so that the cooling process continues to work.
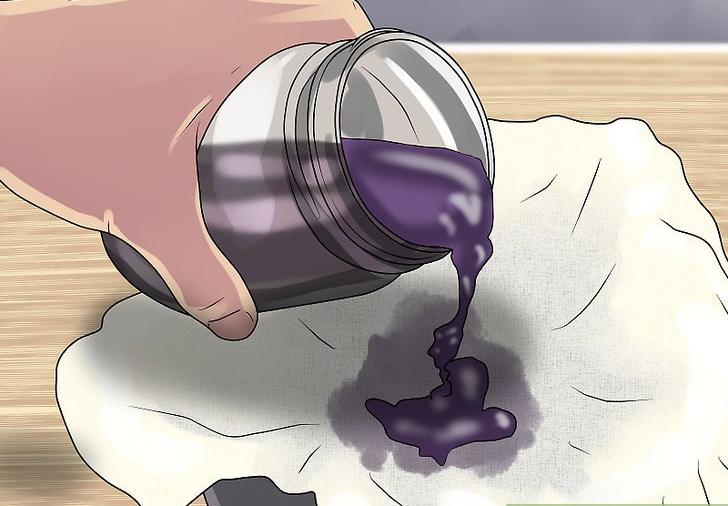 5Filter the collected oil (optional). Once your distillation is complete, you might choose filter the oil through cheesecloth or similar dry cotton fabric. Make sure that the cloth is dry and clean — detergent residues and dirt can contaminate the oil.
- Don’t be disappointed that you get a very small amount of essential oil from a large amount of plant matter. Percent yields vary from species to species, but they’re always lower than a beginning distiller might think.[7]
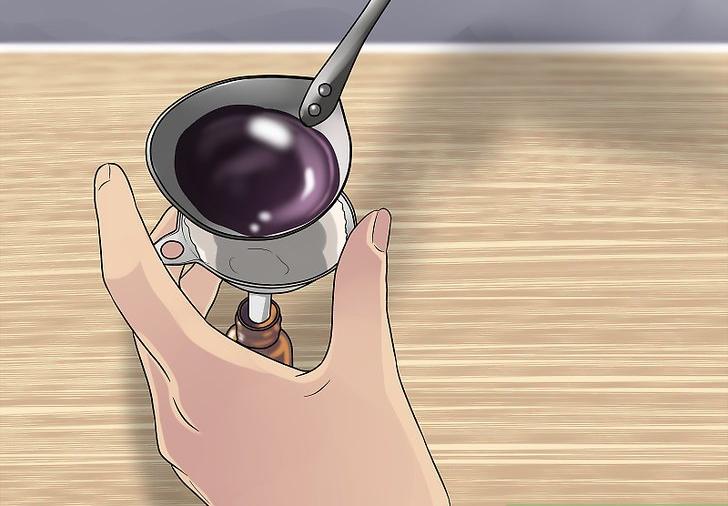 6Pour the oil into a container for storage as quickly as possible. Most essential oils can be kept for at least one or two years, but some have very short shelf lives.[8] To maximize the useful life of your oil, keep it in a dark glass bottle or stainless steel container. Use a clean funnel to pour the oil into the container, and make sure the container is clean before pouring the oil into it. Store it in a cool, dark place.[9]
- Decide what to do with the hydrosol as well. The other material in the essencier is hydrosol — water that’s been distilled and infused with the scent of the plant.
- Some hydrosols, like rose or lavender water are usable themselves.
- If you don’t want to save the hydrosol, you can pour it into the still for the next batch if you will be distilling another batch immediately. Otherwise, throw it out.
